Me and nail stickers don’t get on, I haven’t yet been able to pinpoint the exact reason but I know we just don’t.
The last time I tried nail stickers was for my Batman nails, which although ended up awesome-ish, the stickers were the bane of that mani.
I have also tried lace stickers before, but that mani was way too much of a disaster to even contemplate putting on the blog. They were thick and gummy and ended up sticking up a mile off the nail with extremely visible edges and it just looked nasty.
So with these Born Pretty Store Elegant lace stickers being an option, I just had to give it another go.
There are 30 different designs in the pack, each with 5 strips, here are a few of my favourites:
The Born Pretty Store stickers were much thinner and more delicate than those that I had tried before making them easier to work with.
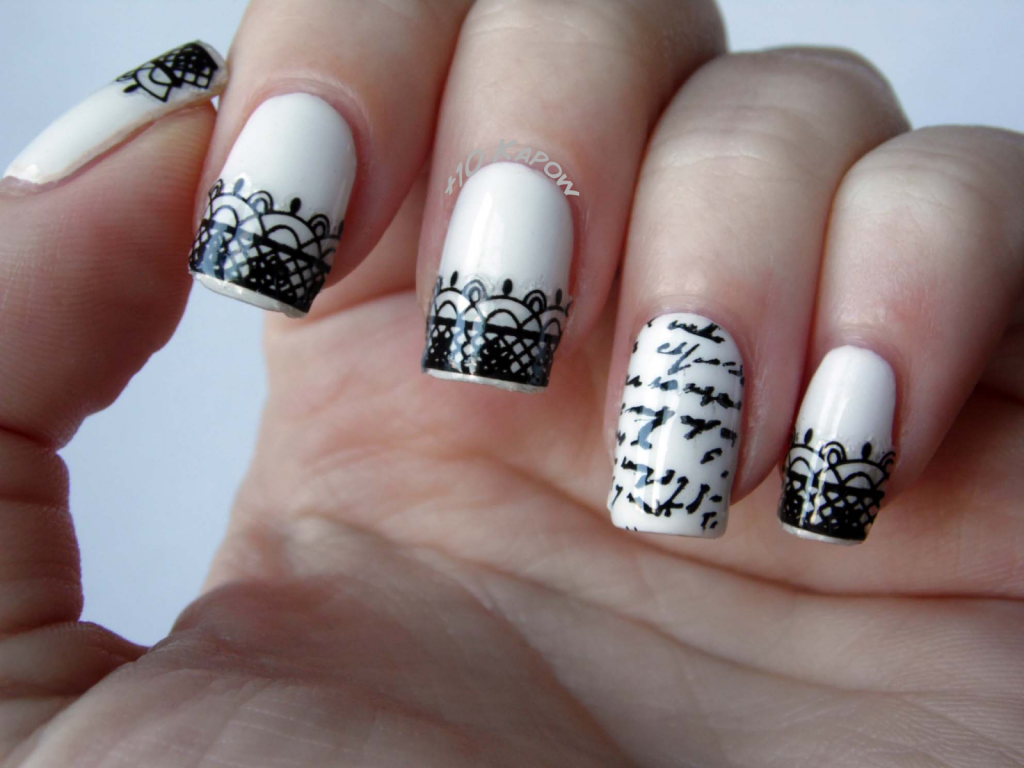
I decided to go along with the name of the product and try some ‘elegant’ monochrome nail art, and try I did.
They stickers applied easily and when I placed them in the wrong place, they were easy to pull up and place back down without ruining the polish underneath.
I used one strip of design C11-09 for my 3 fingers and thumb which was just enough and decided to stamp my ring finger with a design from Moyou pro collection 04 plate.
As with decals, because of my curved nails, I found it difficult to get the whole sticker flat and it took me a while to smooth it out but eventually it did, until I added a topcoat that was and then I got some lift on the edges and the little details along the top of the sticker.
I think part of my problem was placing it so close to the open edge of my nail, even with 2 coats of a standard topcoat and 1 coat of Seche, I still had the lifted parts of the sticker showing and no matter how much I pressed down, they just would not go away.
It still looked pretty though and for those of us who aren’t able to perfect the intricate detail of free handed lace nail art, these are a good idea (when placed properly).
When removing the mani, the stickers were slightly harder to shift than I expected. After several cotton pads and vigorous rubbing, I was left with this:
an accidental mani that, with a little bit of edge perfecting, I would prefer much more than the original.
It still took several more cotton pads and some scraping to remove the stickers after this but they did eventually come off, albeit in little, tiny bits of annoyance.
However, the more I thought about it and started getting the pictures ready for the blog, I wasn’t 100% happy with my lace sticker attempt and thought I would try something different.
Cue mani number 2 (childish chuckle):
I’m fairly certain this is classed as a skittlette, please correct me if I’m wrong, I’m terrible with the names of the different mani’s.
I actually really like this one and it seems that the design of the sticker can make all the difference.With this one being smaller than the last, it seemed less difficult to get it smooth and how i wanted.
 |
| Yay the sun popped out, Holo shot! |
I used OPI Emotions on my thumb and pinkie. The same stamped ring finger from the first mani. Born Pretty Holo #3 on index and middle fingers topped off with lace stickers in design C11-27.
I was much happier with the lace stickers on this mani, mainly because they were in the middle of the nail so no edges were exposed and lifting and I managed to get the design exactly the same on each nail. You can still see the edges on parts of the sticker but its not really prominent.
Overall, this experience with nail stickers was improved. These stickers were easier to use and the pack has a nice array of designs to choose from, plus there are plenty in there if looking to perfect the art of nail stickers.
The Lace Sticker Pack is $5.62 (£3.42), don’t forget you can use my discount code CBAQ10 for 10% off.
AND it’s free shipping anywhere in the world.
:)x
 *The Lace Stickers in this post were sent to me for review, everything else mentioned was purchased by myself. All opinions expressed are my own, honest opinions.


